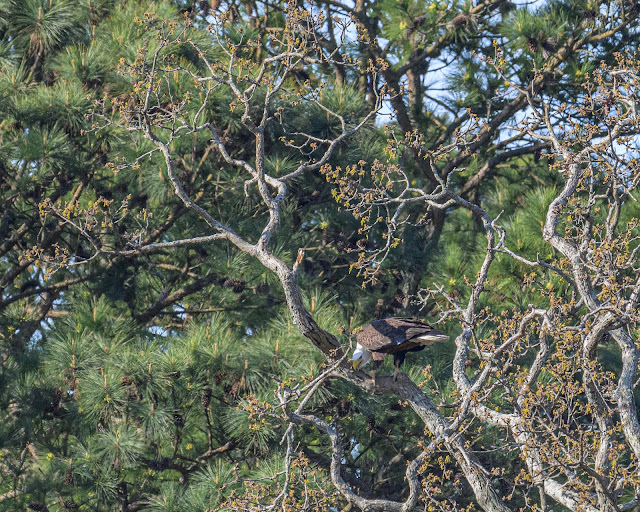
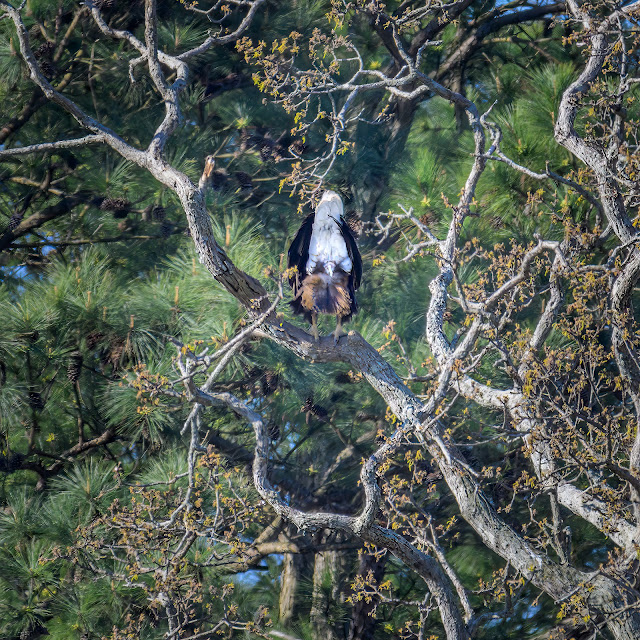
NOTE: None of the images posted here would be otherwise made or posted as the subjects were too far distant to ensure resulting highest quality final images. These were made and posted strictly for testing purposes.
This post is a follow-up to my last post, which you can read here, about my first test run with the Nikon Z8 and Nikon 180-600mm f/5.6-6.3 lens combination photographing Ospreys and Bald Eagles.
As I wrote in my previous post, the Ospreys were a piece of cake, so to speak, for this camera/lens combination to track and photograph successfully. The percentage of pin sharp images was over 90%.
As for the Bald Eagles, it was a bit more difficult to photograph them in any meaningful way as opposed to the Osprey as the eagle's nest was at least 175 yards away. In the past, I've used as much as an 840mm equivalent focal lengths to reach in as close to the nest as possible but as you can imagine there is a bit of image degradation and a lot of work that has to be done in Lightroom plus plug-ins to make the images acceptable. Most of the problems at that distance are due to atmospheric conditions such as haze caused by humidity and heat distortion.
On this outing I did manage to see one adult leave the nest and fly to a dead tree about 220 yards away. Another left the nest and flew in the opposite direction to me. Even more challenging. However, due to the extreme distances, I thought this would be a good time to try out the DX mode on my Z8. For those non-Nikon shooters, DX is a 1.5X crop, the same as an APS-C sensor would give you. In DX mode, the camera reduces file size from 45.7mp to 19.3mp. Still enough to create excellent images if subjects are at a reasonable distance.
A comment about photographing in DX mode. One would think that it might not be the best thing to do. After all, isn’t it better to crop the frame back at your computer while using your editing software rather than in-camera? That way you have more flexibility to adjust the crop. In the past when we used DSLRs I would agree with that. However, there is one benefit using mirrorless cameras for cropping in-camera using DX mode and that is the image in the viewfinder is magnified to fill the entire frame. In DSLRs it was not. That means the autofocusing system is seeing your subject 1.5X larger and can more easily focus accurately than if your subject was tiny. That can be the difference between a sharp image and one that just misses.
There is an interesting trade-off that you should consider using something such as the DX mode versus a 1.4X tele-converter. You’ll have to decide which may work better for you. You can use the DX mode and get the 1.5X magnification at a reduced pixel count but keep your same native maximum aperture on your lens or you can attach a 1.4X tele-converter, keep the full pixel count but then lose one stop of light, which of course, will require a higher ISO or longer shutter speed. With the Nikon Z8 and 180-600mm f/5.6-6.3 lens as an example, using DX mode results in keeping f/6.3, reducing pixel count to 19.3 and having an effective focal length of 900mm. However, when using a 1.4X tele-converter you keep all 45.7mp, have a slightly reduced effective focal length of 840mm but lose one stop of light with a reduced aperture of now f/9. As I said, you decide which is best. Oh! Of course, you’ll also have to buy the tele-converter so there’s that expense as well.
One more thing about in-camera cropping. With some camera systems there is an additional benefit. When using a cropped mode in-camera, the camera’s processing engine will then rebuild the file to full size. Olympus, for one, does this. They take the reduced file size and uprez it back to 20mp. The downside to what Olympus does is that it only does it with JPEG files. I think in-camera cropping with mirrorless cameras is a nice, but not often considered, benefit.
The eagle which landed in the dead tree about 220 yards from me decided it would face, for the most part, looking away from my position. As I watched it through my viewfinder, I did make a few exposures if it slightly turned toward me. In one of the images the Bald Eagle while it was facing away from me it raised its rear and defecated. I got "mooned", I think! lol. I did manage to hit the shutter button as it did. The image is below.
My time with the eagles was short due to lack of seeing them and any action so I moved on and returned home. Here are a few test images.
-1775.jpg) |
| This is a crop of the above image. This image represents 4.2% of the overall 45.7mp sensor. (click to enlarge) |
 |
| It landed but unfortunately, it stood facing the opposite direction so my images of it show its back more than anything else. (click to enlarge) |
 |
| It did turn sideways a few times so I snapped some shots of it as it did. But my favorite image... (click to enlarge) |
 |
| ...is this one as it raised its tail and "mooned' me! lol. Actually, it was defecating. If you look closely you can see the white waste starting to emerge from its anus. (click to enlarge) |
One thing I really like about this camera is that I can program one button to change all the settings instantly—and it holds those changes until I press it again. For example, if I am photographing a landscape and a Golden Eagle flies by all of a sudden, I can press a button to change all of my settings to what I would have if I were photographing birds-in-flight. Instantly. Then, when the action ends, a press of the button returns my settings to their previous states.
Before I forget, a short comment about the benefits versus drawbacks of a zoom lens versus a prime. Yes, most expensive and fast prime telephoto lenses are a little sharper than a good zoom. But by how much these days? I contend not enough to overcome the drawbacks of first, cost ($4000-$15,000 US) and second, flexibility. Just using this first outing as an example, I would not have been able to make many of the images I did if I had a 600mm prime lens. As the ospreys (shown in my lasty post) soared around the sky, coming closer and closer, a 600mm prime lens would have been useless. However, I was able to easily zoom out and keep them in my frame. I’ve found fixed focal length long telephoto lens’ drawbacks too great to want to buy and use one.
As far as fast telephoto primes being (a little bit) sharper, they typically are but as a practical matter is that small difference in sharpness still meaningful today? Typically, visible difference in sharpness is usually on the edges and corners of the frame but most of our subjects when using long telephoto lenses in in the center or near the center where there is little difference, if any.
Second, if you want a little extra sharpness one can use DXO, Topaz or another plug-in if that is what turns you on. I think the differences are largely inconsequential today. But that is just me. My zooms are more than sufficiently sharp for all my uses.
For a relatively inexpensive lens ($1700 US), I am very impressed with the size, weight, build quality, quickness of autofocus and, of course, the sharpness of my images. The Nikon Z8 and this lens makes for a wonderful combination for birds and wildlife. I can’t wait for my early summer trip to Yellowstone and Grand Teton National Parks to see how well they perform with large mammals. I suspect, very well.
One more comment. I've read a few reports from owners of this lens that they didn't think it was sharp at 600mm. From what I've read and some examples I've seen I think some of those owners’ assessments are correct. That makes me think there may be a bit of sample variation in individual copies of this lens. Also, I think in other instances, it may be user error or needed improvement in photographic technique that is the root cause of their complaints. I just wanted to throw this out for those of you who are considering buying this lens. My advice is don't buy gray market or used as you may not like the individual copy you have and you might have a hard time returning it. Just FYI.
As for me, I am very happy with everything about this camera and lens combination.
I hope you enjoyed these last two posts about my test run of my new camera/lens combination. I welcome your thoughts and comments.
Join me over at my website, https://www.dennismook.com.
Thanks for looking. Enjoy!
Dennis A. Mook
All content on this blog is © 2013-2024 Dennis A. Mook. All Rights Reserved. Feel free to point to this blog from your website with full attribution. Permission may be granted for commercial use. Please contact Mr. Mook to discuss permission to reproduce the blog posts and/or images.


-1775.jpg)

Interesting post. The Z8+180-600 is clearly a high performance combination.
ReplyDeleteHave you been able to determine a favorite or most reliable AF setting for medium to large birds in flight?
I find the additional "real estate" of the full frame, or FX setting, to be valuable in keeping the subject completely in the frame. I evidently wave the telephoto all over the place given the position in the frame of the subject that I tried to keep centered. This "real estate" would be most important if I decided to return to BIF images with a full frame camera.
Surprising to see eagle chicks so early in the Spring.
Glad to answer your question. Thanks for asking. I’ve found “Auto Area AF” which uses the entire screen is the best setting for singular large birds-in-flight. The subject detection finds them every time, locks on to them and just holds focus as I follow the bird around in the sky. As a benefit for you and what you describe, you get to use the entire EVF screen. Lots of real estate. If there are multiple large birds and I want to select a particular one, I have a function button that allows me to just push it repeatedly and scroll through the various AF modes. Very fast. I’ll choose either Wide Area Small or Wide Area Large and place the bird within the red box. It will then AF on that bird and hold focus. Another option is 3D Tracking. Placing the small red box over my target (bird) and holding in the AF-On Button (or Shutter Button if you prefer that method) the camera locks on to my target and literally follows it all over the frame. It is amazing how “sticky” 3D Tracking is. I hope this helps. ~Dennis
Delete